
FLV full name Flash Video, it is best popular video format on internet, FLV has quickly established itself as the format of choice for embedded video on the web. Notable users of the Flash Video format include YouTube, Hulu, Google Video, Yahoo! Video, metacafe, Reuters.com, and many other news providers & video sharing website.
1, Adobe Flash Player - If you can not preview FLV file, please install Adobe Flash Player first.
Download site: get.adobe.com/flashplayer/
2, Video Watermark Pro – A professional video watermarking program, allows you embed text, image(include animated gif), logo, sign to your video in batch mode.
Download site: https://www.video-watermark.com/products/video-watermark-pro.exe
Step 1 – Launch Video Watermark Pro and load your FLV files.
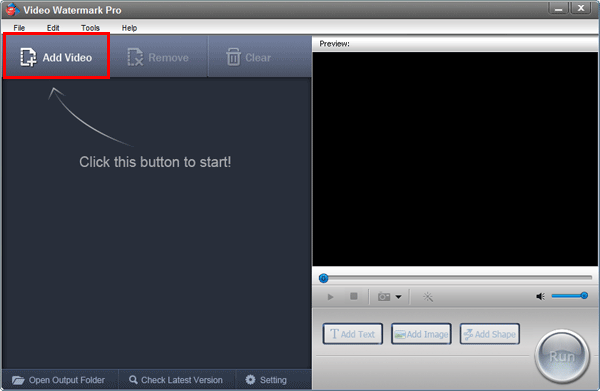
Step 2 - Here are three watermark modes text watermark, image watermark and shape watermark, this tutorial just for image watermark.
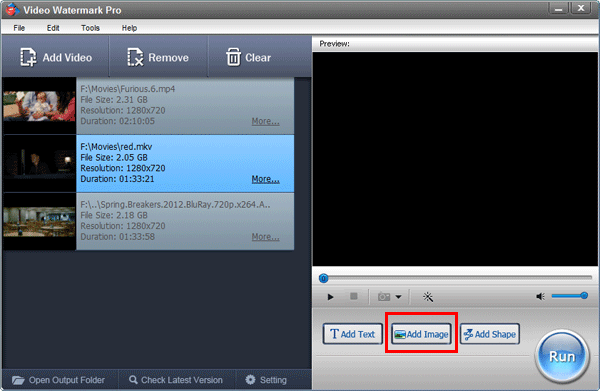
Click 'Add Image' button into image watermark editing interface.
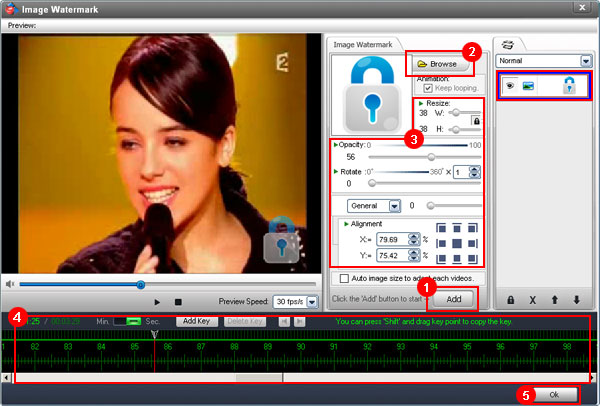
Step 2-1) Click 'add' button to create first watermark layer, now you can see the image watermark on the preview window, move cursor on the watermark, left click and drag it.

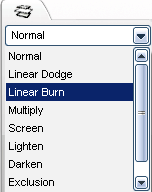
Tip: If you want to create multi layer, just 'Add' button more time.

Tip: Here are many effects for layer mix.
Step 2-2) Click 'Browse' button to select an image for watermark or load new image from your hard disc. Here are over 150 beautiful watermarks.

Step 2-3) Watermark resize, opacity setting, rotate, etc.
Step 2-4) If you do not want to the watermark show in all of time, such as 1-3 minutes show watermark 1, 3-4 minutes show watermark 2, 4-8 minutes get some watermark animation, etc… You can do it via time line editing.

Per second/unit
![]()
Per minute/unit
![]()
Add a start/end point for current time
![]()
Remove selection point
![]()
Move the pointer to previous and next point
![]()
Example:
Click 'Add Key' to create a point in first seconds, drag the pointer to tenth seconds, at this time, adjust Opacity from 100 to 0, then play the video, you can see the watermark will gradually disappear in 0-10 seconds.

Click https://www.video-watermark.com/sample/text-watermark-sample-2/ to see full video sample.
Step 2-5) After you finished settings, click 'Ok; button save changes and return to main interface.
Step 3 - Click 'Run' button into output setting, select output folder, video format, video and audio settings. Click 'Run' to start watermarking process.
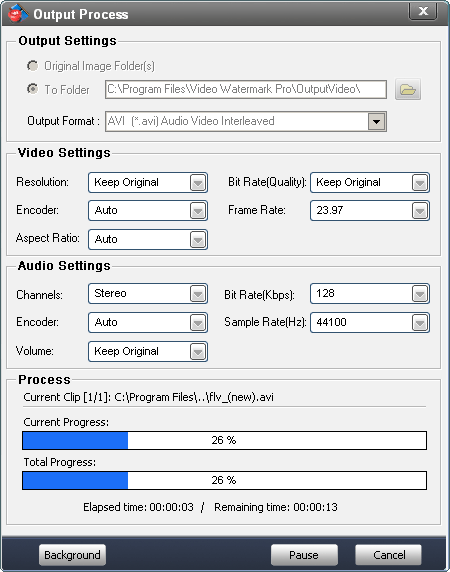
Just wait moments, you will see your watermarked video(s).
Tip: After done, the output folder will open automatically.