
Overview - Shape Interface
Clicked 'Shape' button, you will see the following main interface(Pro edition only).


Preview window - You can play, pause your video and watermark effect with this window.


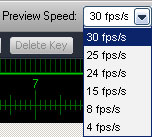
You can select a speed to playing the video, here are 4/8/15/24/25/30 fps/s.
Tip: Most movies speed is 25 fps/s

We have four shapes to select:
3-1, Creating a line segment, you can also creating an arrow for the line segment. Another option is closure the line segment and set a fill color.

3-2, Creating a curve, you can also creating an arrow for the curve.

3-3, Creating a rectangle, you can also set a fill color for the rectangle.

3-4, Creating a ellipse, you can also set a fill color for the ellipse.


Common settings for shape


Set a color for above shapes.

Adjust thickness for above shapes.
 Important
 - the 1st step, click 'Add' button to start text watermark setting. You can not make any changes before clicked 'Add' button.


Shape layer - the layer like adobe photoshop, all of settings are based on the layer, you can also creating
multi-layers to making rich watermarking effects.
Tip: Click the eye icon to disable current layer.


Buttons of layer

Freeze other layers, at this time, you can only edit current layer.

Delect a selected layer.

Move up selected layer.

Move download selected layer.

Time line button:
Time point display with minute.
Time point display with second.

Key point button: You can make complex animation with multi key point, such as insert point 1 and make the coordinate to X=100, Y=200, and then, insert point 2 and make the coordinate to X=300, Y=100. At this time, play the video, you can see text of oneself moving from there to here.

Insert a key point

Delete a key point

Previous key point

Next key point

Pointer of time line.

 Home
Home